The Build Process Part 2 | Building realistic interiors
INTERIORS = LIFE. Fellow builder KingRooster121 inspired me to start doing them and here I thank him profoundly for that. Of course, if you tell anyone you’re furnishing every building in a massive Minecraft city, they’ll think you’re crazy. But let’s get real – you’re gonna copy paste these floors with World Edit (or perhaps structure blocks on Bedrock), and they’ll quickly get lost in the grand scheme of things.
- Part 1: The Build Process Part 1 | Make better city buildings – Premium Minecraft Blog
- Part 2: HERE
- Part 3: The Build Process Part 3 | City planning and districts – Premium Minecraft Blog
- Also see: Steps to plan and start a realistic Minecraft city (Tips, ideas, server setup?)
The interior process
This is the general process that I’ll show in detail below. For reference, I described how a building generally divides into a top, middle and bottom portion in part 1 of this blog series.
- Add a central core with stairs (and an elevator or two in taller buildings)
- Bottom – Add walls/lights/interior to lobby/shop area at street level, if any
- Middle – Add walls/lights/interior to one floor, such as furnishing one floor with apartments, and copy paste it upwards. You will have issues with this if your building has an awkward shape, sorry!
- Top – Refer to part 1 of this blog series on HVAC equipment and terraces
LESS IS MORE – you don’t need to over-detail your interiors, as long as they give the right idea and have all the basics. Disclaimer: I use a texture pack in this blog post, but these tips apply to any or none texture.

The central core
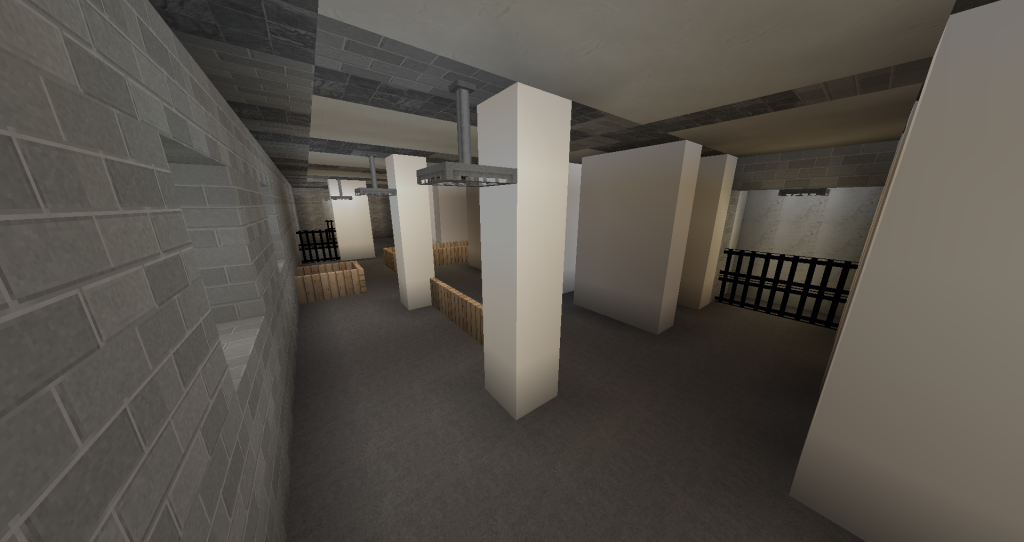
Any building taller than 1-2 floors should have a central supporting core. Inside this core you should place stairs and elevators. Generally, buildings taller than 4-5 stories should have an elevator. When you do this core for one floor, stack it upwards the whole height of the building, optionally to the rooftop. If your building has a large floor area, you should also add supporting columns throughout the building.

Bottom
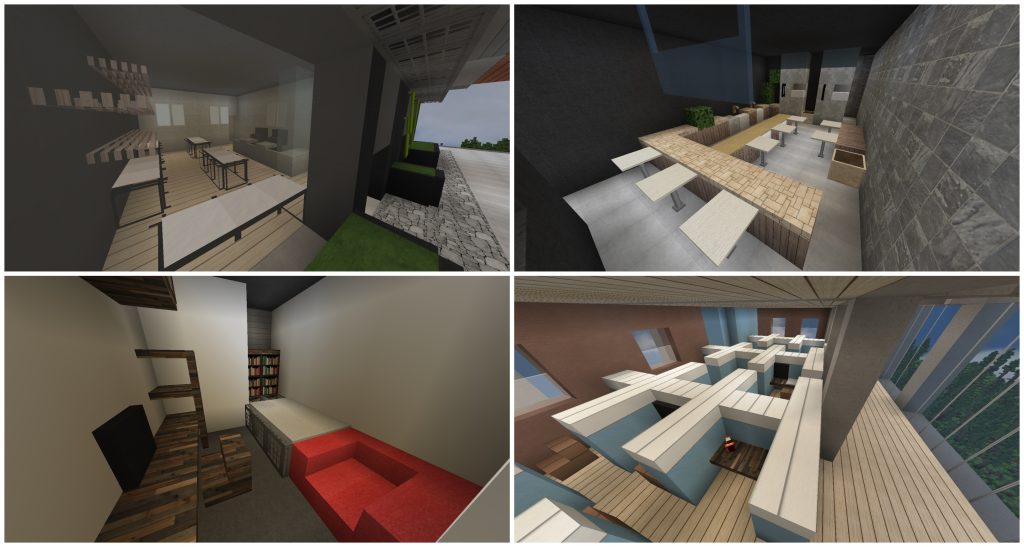
In general, the ground floors of my buildings have a few shops with street exits, a shared store backrooms (no, not *those* kind of backrooms), and a private entrance off to the side with stairs upwards to the main middle part of the building. The shops have large windows, and I add details such as: An overhang, bench out front, shop signage (wool encased in trapdoors/iron bars for a sticking out sign/or wall banners).
Inside, what I make depends on the shop type. Don’t forget a custom floor/colors, a doorstep and lights. More on these specifics in the next section (“Middle”).
- For restaurants, there will be a counter, tables, plants, and an over-the-counter menu from glass panes. The backrooms will feature a kitchen type area with fridges.
- For a shop I’ll make a counter and shelves from trapdoors, plus wall banners for ads. The backrooms will have more shelves, an employee relax area or wooden crates.
- For a jeweler or technology store, I’ll add glass cases – such as white carpet on top of a glass block on top of a quartz block. Also, use darker, more “luxury” colors.
- For other businesses like a barber, insurance office or post office, just replicate from images.
Alternatives to the shops:
- Create a lobby area, such as for a hotel or office space.
- Skip the ground floor entirely, e.g. an apartment building where the ground floor is also an apartment with no special distinction.
- Skip the ground floor but in a funky way – raise your building up on stilts or a cantilever, with a plaza or car park on the ground floor. Don’t forget stairs to the upper part of the building!

Middle
The middle of the building is the main part – e.g. the many floors with actual office cubicles, meeting rooms and toilets in an office building, above the lobby. Here is a general walkthrough of how I would furnish an empty apartment floor, before stacking it upwards the whole height of the building.
For true realism, you should line up your “services” – as in, the bathroom and kitchen plumbing should be close to each other in the home and in-between flats. For multiple floors, keep these rooms “stacked” one above another. Just: don’t randomly put your bathroom on the other side of the home if you can help it.
Tip: Use a different block for the ceiling – e.g. do a top-slab ceiling, or double thick floor.
- Image 1 (below): Create a 1 block high flat layout of the floor. In this case I want a spacious public hallway with stair access, and the private apartments branching off. You can double layer some walls to give different materials/colors to different apartments or rooms.
- Image 2: Always consider the purpose of the space. Here’s an example layout of one apartment. Since this building is unevenly shaped, I made 4 entirely unique apartments. I recommend you do unique apartments anyway and don’t copy paste rooms on the same floor, since you’ll be copy pasting the whole floor itself, so you want some variation.
- Image 3: Once I’m happy with the layout, I stack it upwards to the ceiling. Time for some details:
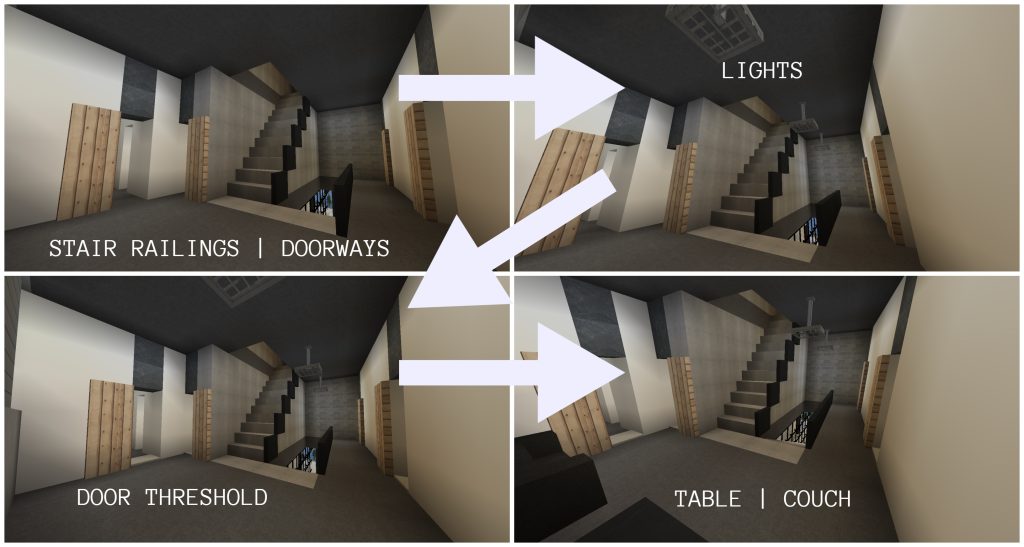
- You will notice that all door gaps are floor to ceiling high, which is wrong. On the inside of the apartments add doorframes the same color as the walls. On the main exit doors you can use a different block to differentiate it. The doors should have carpet thresholds.
- Add details in the hallway. The stairs can have trapdoor railings. In a larger hallway, place a couch or table. LIGHTS: Bedrock users can /give themselves “light” – a literal light block – to light up all their interiors. Java players can use an end rod and trapdoor to create a modern lamp. Even if you use the light block on Bedrock I recommend adding some fake lamps – at least in the main hallway area.
- Images 4/5: FURNISH! How I go about it: I fill my hotbar with blocks needed to furnish a certain room or area, and go to each apartment furnishing that one room or area. In the two images my 4 apartments use the same blocks, but the slight layout and furniture variations make it unique.
- I basically work in a routine and layer the interior. Find ways to replicate the generic furniture needed in each room – e.g. KITCHEN = fridge, sink, oven, counter tops, dining table. I like to add in plants throughout the interior whenever there is an empty wall.
CLICK IMAGES FOR FULL SIZE


Roof
If the top of your buildings contains a penthouse apartment, furnish it separately with the process above. I like to add a smaller attic space on top of apartment buildings, and complete it with very basic storage rooms/cupboards with crates and fenced off areas. Example below. You could also provide a staircase with roof access and add a small terrace with seats and greenery on the rooftop.
The roof itself should contain fenced off HVAC equipment – as mentioned in part 1 post. Search it up and replicate it. For really tall skyscrapers you should cut out the middle floors at X floor intervals and replace them with mechanical floors containing HVAC equipment to make the building run! Look to real life architecture for inspiration and save pictures that spark your ideas.

Links & Inspo
- Building reality: A look through the eyes of Minecraft architects – Premium Minecraft Blog
- Blocky interior design – ModernCraft realism in Minecraft – Premium Minecraft Blog
- Building A City #66 (S2) // Interior // Minecraft Timelapse – YouTube
- Minecraft Apartments using Architecture Theory (1630 Stadium Way) – YouTube
- Part 1: The Build Process Part 1 | Make better city buildings – Premium Minecraft Blog
- Part 2: HERE
- Part 3: The Build Process Part 3 | City planning and districts – Premium Minecraft Blog
- Also see: Steps to plan and start a realistic Minecraft city (Tips, ideas, server setup?)

No comments yet.