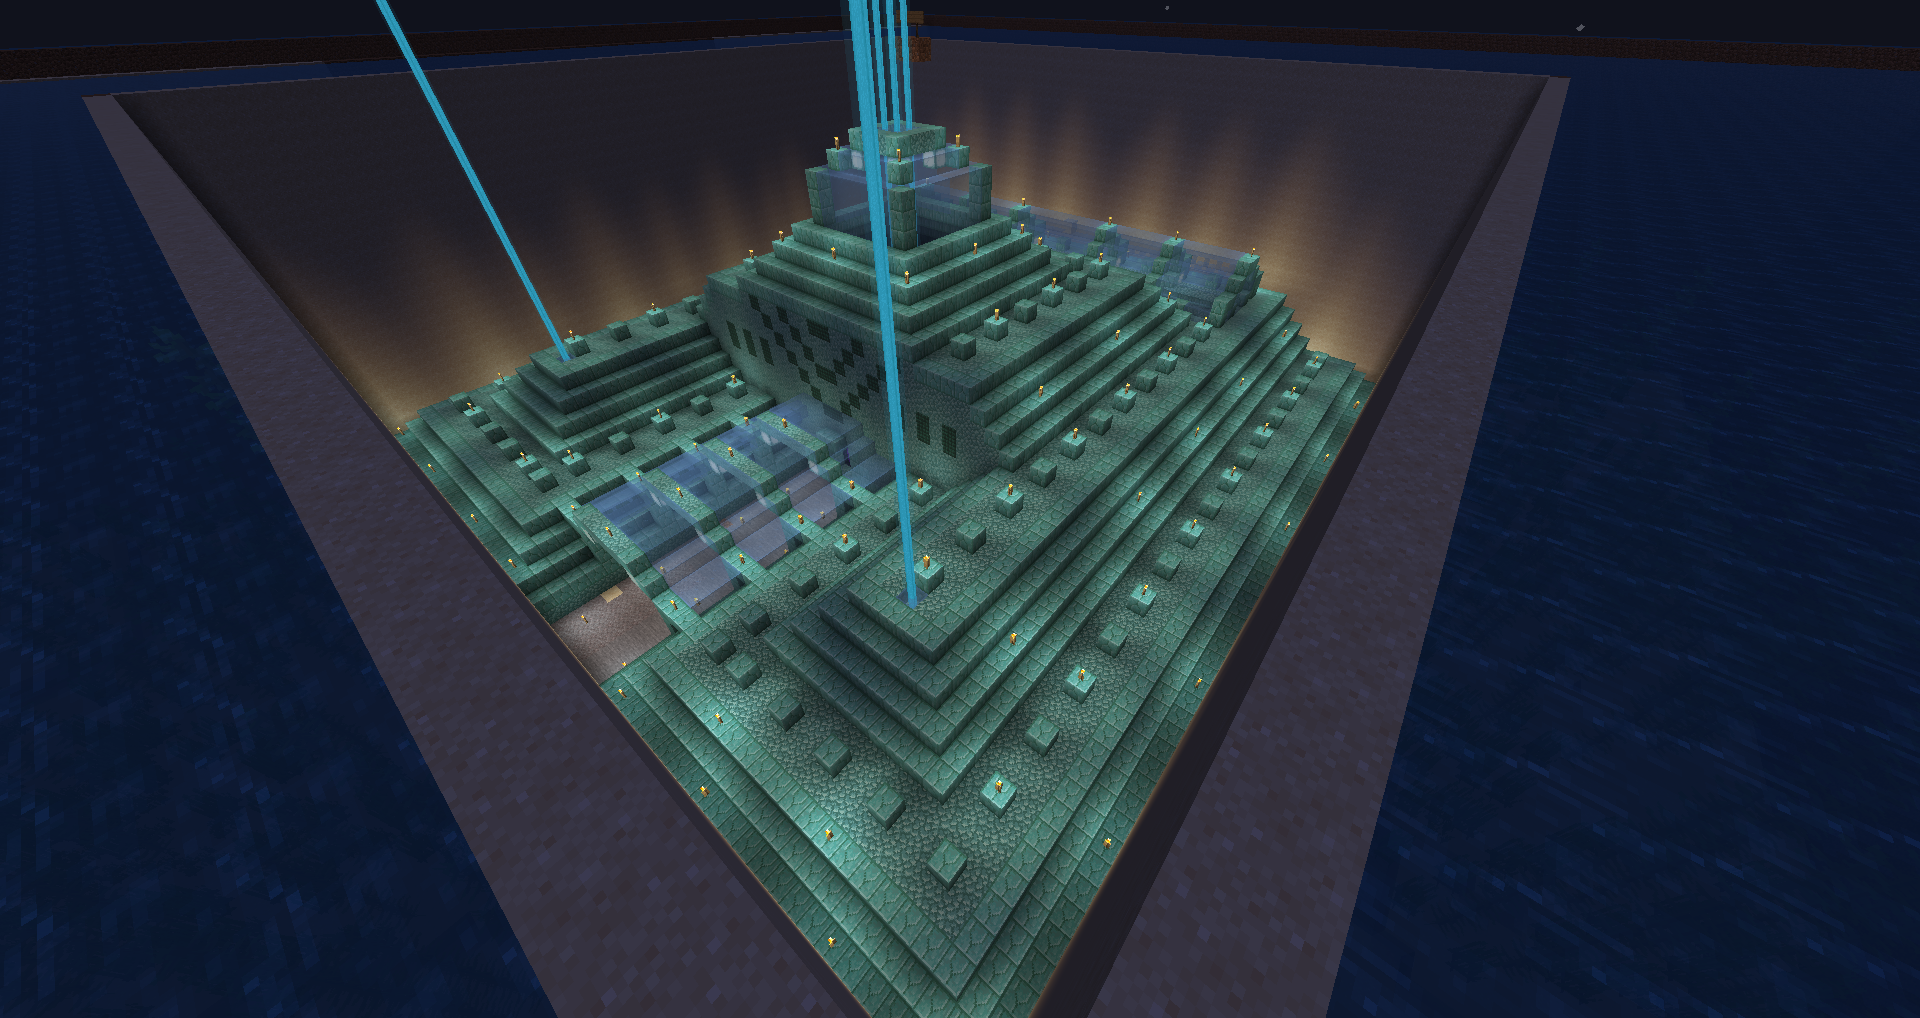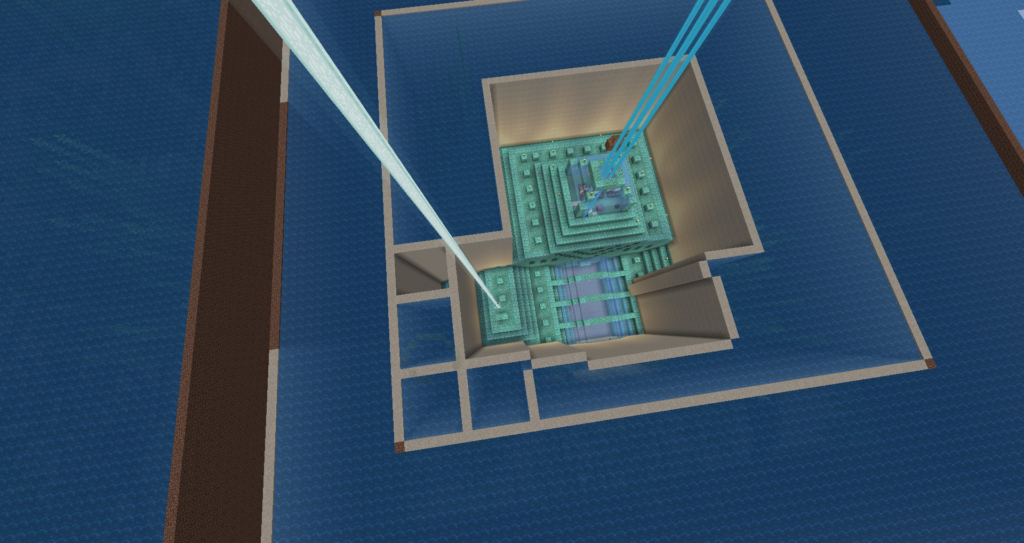
Drained ocean monument + storage system in survival
After hours of work over several days, I had fully drained an ocean monument, including the inside, and the land around it (100×100 blocks area drained in total). It’s now an epic base! Here’s an overview of the what and how.
The draining process
TLDR
Make a boundary wall around the monument, drain everything inside using a sand grid (5×5 grid, break sand with torches to reuse it), don’t die to guardians, keep drying the sponges using a nearby nether portal or furnaces.

Materials needed
- Dirt, glass or other block (stacks) (for the boundary wall of the drained area)
- Sand or gravel (stacks) (for the drainage grid)
- Torches (maybe 30) (to break and reuse the sand)
- Sponges
- Optional: efficiency V spade, aqua affinity and respiration, water breathing or night vision potions
- Anything else that speeds up the process
(This describes how you SHOULD drain a monument… I sort of started out wrongly and completely inefficiently before doing things properly.)
To get sponges, you’ll have to go out and find other monuments in your world. You’ll need to find a single sponge room to get enough sponges to efficiently drain (explore other monuments thoroughly, look for holes in the ceilings that may lead to the hidden room, each one holds around 30 sponges).
Now, draining. I outlined a 100×100 area and built a huge dirt wall around my ocean monument. My goal was to drain everything inside the dirt wall. Yes, the wall took a LOT of dirt. However, there are many other ways to approach making this sea wall boundary. A lot of people make it circular (I kept it square). You can also use glass so that once everything inside is drained, you will get a clear view of the ocean outside on the other side.
Then, I gathered stacks of sand into a shulker from a nearby island. A single shulker of sand was more than enough. You can also use any gravel you have lying around. To drain, start at an edge, and place down a 5×5 sand grid. Place 2-3 grid squares at a time, and keep reusing the sand from drained grid squares! (Break the bottom block of a sand column and instantly place a torch, so that the above sand will fall and break, works even better with lag.)

Interior
The interior was the first thing I drained, though I don’t think the order matters. It meant placing sponges in every single corridor and every single room, slowly removing the water. Next, I also mined out the whole interior walls and floors to make one huge and impressive room. This gave me plenty of prismarine blocks for building and decorating with!
Lastly, once both inside and outside of the monument was drained, I added huge windows from blue glass in parts of the temples roof for natural light. Also, BEACONS! I am rich, but hey, this was on a server.

Storage system
While I’m unsure of how I’ll decorate the whole interior, I did make a large storage area, which takes up a whole side wall and uses two rows of double chests (over two stacks of chests!)
There is potential to make an automatic system, but that’s a bit complex and unnecessary for me right now. My system does however have an interesting labelling system I see not many people use – blocks. Each set of two double chests (one on top of the other) is a seperate category of items. Some are more obviously labelled than others, but it works perfectly to show what’s where at a glance. For example:
- Chests that hold valuables have a gold block above them.
- Armor = diamond block. Tools = iron block.
- Food chests are labelled with a melon block. Farming chests with a pumpkin.
- Chests that hold blocks are labelled with that block, like cobblestone for stone related blocks.
- Horse armor and saddles use a wheat block.
- Items from the End use a purpur block. Items from the nether use wart blocks.
Even more examples:
- All redstone related items are under a (you guessed it!) redstone block.
- Potion chests have a brewing stand on top of a trapdoor above them.
- The chests with random blocks (like bricks, obsidian etc) are labelled with a brick block.
- Functional blocks like beds, villager job site blocks = bed on trapdoors
- Also, for armor and tools, I split apart enchanted and non enchanted items, for example:
- With tools, iron block = enchanted tools. Next to it, a chest with gray wool = unenchanted.

No comments yet.